- Counting the decrease
Reading your knitting. The stitch that holds 2 stitches together in a decrease is the stitch you count as your decrease.
—added January 3, 2013
- Blended and Full-Fashion Decreases
When decreasing for the armholes in a sweater, we are often told to knit 1 (or 2) stitches, ssk, knit to the last 3 (or 4 stitches), knit 2 together
and knit the last stitch(es). These are blended decreases; they slant inward. On the purl side, p2tog at the beginning of the row; ssp at the end.
Full fashion decreases slant outward. At the beginning of the row, k2tog; at the end, ssk. On the purl side, ssp at the beginning of the row; at the end, p2tog.
—added July 3, 2014
- Central Double Decrease
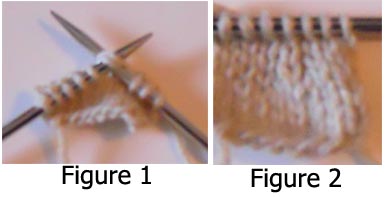 Abbreviated as CDD, this is creates a nice design element. Slip 2 sts together knitwise (Figure 1); k1, pass the 2 sts over the
stitch just knitted at the same time. You may have to gently tug on the top stitch so that the second slipped stitch does not peek out. Figure 2 shows the completed decrease. Abbreviated as CDD, this is creates a nice design element. Slip 2 sts together knitwise (Figure 1); k1, pass the 2 sts over the
stitch just knitted at the same time. You may have to gently tug on the top stitch so that the second slipped stitch does not peek out. Figure 2 shows the completed decrease.
—added March 23, 2013
- KSP
Though K2tog is faster than KSP, KSP more closely mirrors SSK and will result in a more polished look.
Knit the stitch and return it to the left needle purlwise. Pass the next stitch on the left needle
over the stitch you just knit. Return the knit stitch to the right needle and continuing knitting.
—added August 7, 2016
- P2tog tbl alternative (purl 2 together through back loops)
Purling two stitches together through the back loops (p2tog tbl) on the reverse side can result in a tight stitch. If decreasing for an armhole, for example, the edge might not be very stretchy. Here is a way to get the same left-slanting (on the right side) decrease that is not tight.
Work to the two stitches to be purled together through the back loops.
Turn work and with right side facing, slip 2 sts to the right needle.
Slip 1 knitwise; slip the next one purlwise.
Inserting the needle through the front of the 2 sts from left to rightt, knit the two stitches together by .
Turn and with wrong side facing, move the stitch back to the right-hand needle, ensuring the stitch is mounted correctly.
—added April 3, 2015
-
Smooth SSKs
SSKs usually are wobbly. Cat Bordhi has developed a method of creating smooth SSKs while knitting in the round. She calls this method "Hungry Stitch" and you can view the video here.
Here are the written directions, slightly modified.
- On the row before the first SSK: Slip the stitch purlwise before the future SSK to create the Hungry Stitch (HS). Repeat as many times as necessary to the end of the round.
- Knit to the HS and and bring the yarn in back through the stitch, just like picking up a dropped stitch. (Cat calls this feeding the HS.) Place on right needle, do not knit. Work SSK. (I use SSK Improved.) Repeat as many times as necessary to the end of the round.
- Repeat these until all the decrease rounds are completed. If there are rounds of even knitting, always feed the HS and do not knit it.
- On the last decrease round, feed the HS, slip to the left-hand needle and knit it.
- Note: I do not knit the SSK stitch in the back loop as Cat does. It creates a twisted stitch. Here is an image of my result.
—written directions added July 30, 2016
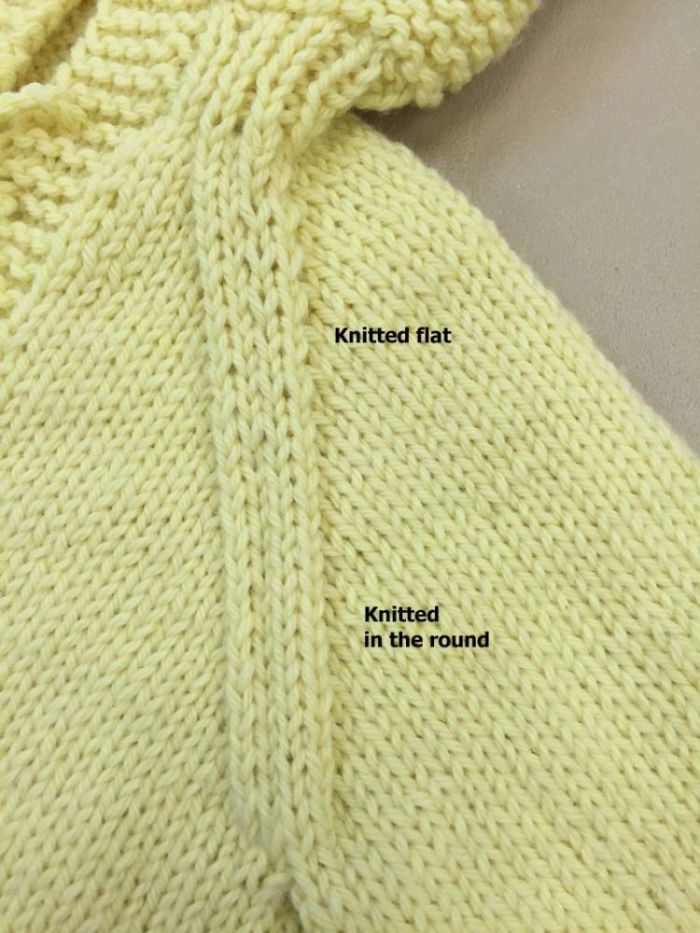
—image added July 30, 2016
|
This Wonder Wallaby is knit in the round until the placket that begins several rounds after joing the sleeves. I used the Smooth SSKs technique, slightly modified, as described by Cat Bordhi.
When I changed to knitting flat, I used the method describe below. Take note of the K2togs. They are so even when knitting in the round. When knitting flat, each decrease every other row is a little bigger than the stitch below it. This is because our purl stitches are usually larger than our knit stitches. |
Can this method be used for flat knitting? Yes, it can. First, watch Cat’s excellent video. Then follow these steps.
- On the purl row before your first decrease, purl to one stitch beyond where you will SSK. In the sample, I decreased by SSKing the third and fourth stitches on the knit row. Therefore, I purled up to the second stitch from the end of the row. I then slipped that stitch and worked to the end of the row. Click on the Figure 1.
- On the knit row, I knitted up to the slipped stitch. I then brought the yarn between stitches 2 and 3 (Figure 2), through the stitch and immediately put the stitch on the right needle without knitting it. So now this stitch has been slipped. Then I worked an SSK using my usual method.
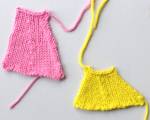
- I repeated these two rows until my decreases were complete, as seen in the yellow sample. Notice how smooth the SSKs are in contrast to the decreases in the middle of the swatch.
- The pink swatch shows decrease made every 4th row. In that case, I repeated the same two rows except that I decreased every 4th row. What a difference!
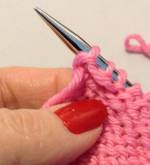 |
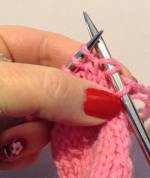 |
 |
| Figure 1 |
Figure 2 |
Figure 3 |
—added April 6, 2014
- SSK
Instructions, especially in older patterns, often call for s1, k1, psso (sometimes referred to as SKP). Use ssk instead. It results in the same left-leaning decrease but puts far less stress on the first stitch in the pair.
Slip the first stitch knitwise; slip the second stitch knitwise; knit in the back loops of the two stitches. The decrease will lay a bit flatter.
—added January 3, 2013
- SSK “Improved”
Slip the first stitch knitwise; slip the second stitch purlwise; knit in the back loops of the two stitches. The decrease will lay a bit flatter.
—added November 27, 2011 Thanks to An of the NOPL Knitters for reminding me of this!
- Mirroring SSK with KSP
Usually we use K2tog to mirror the SSK decrease. For a decrease that truly mirrors SSK, try KSP. Knit the stitch and return it to the left needle purlwise (to ensure the stitch is correctly mounted.). Pass the next
stitch on the left needle over the stitch you just knit. Return the knit stitch to
the right needle and continuing knitting.
—added May 25, 2011
- Twisted SSK
If you want a twist in the left-slanting decrease, try one of these two methods.
• S1 purlwise, s1 knitwise, knit in the back loops of the two stitches.
• S1 purlwise, s1 purlwise, knit in the back loops of the two stitches.
The second method results in a more pronounced twist.
—added July 12, 2014
- Even Smoother SSK
This method is easier than the Smooth SSK method and produces great results. Begin as you would the SSK "Improved:" S1 knitwise, s1 purlwise.
• Slip the left needle through the front of the two stitches you just slipped (Figure 1).
• Wrap the yarn around the right needle and pull through the two stitches (Figure 2).
• Bring the yarn through the two stitches and drop only the first stitch (Figure 3).
• Pull up on the remaining stitch, creating an enlarged loop (Figure 3). Now drop it off the needle.
• As you continue knitting, you will find that the next stitch you knit tightens up the loop.
• In Figure 4, the black arrow is pointing to the Even Smoother SSKs; the red, to the traditional SSK.
|
|
|
|
| Figure 1 |
Figure 2 |
Figure 3 |
Figure 4 |
The second method results in a more pronounced twist.
—added May 28, 2017, adapted from yarnsub.com
- SSP
Typical ssp instructions directs the knitter to slip as to knit, slip as to knit, slip the stitches back to the left-hand needle, purl the 2 stitches together. This results in a twisted stitch. To avoid this, slip as to purl, slip as to knit, slip the stitches back to the left-hand needle and purl together. No twisted stitch!
—added July 3, 2014
- Where to decrease
Many patterns call for decreases at the beginning and/or end of a row. At the beginning of the row, knit one or two stitches before placing your increases. At then end of the row, knit to 3 or 4 stitches and then decrease. You will have a nice edging to work with for the finishing.
—added January 3, 2013
|


